![]()
![]()
![]()
![]()
![]()
![]()

![]()
![]()
![]()
![]()
![]()
![]()
|
|
|
|
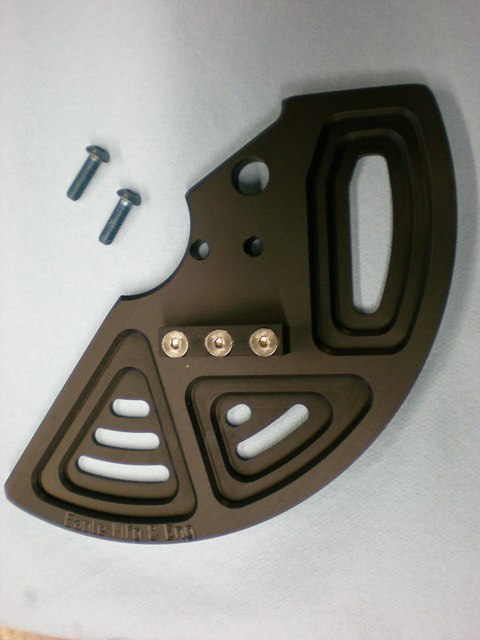
Installing a sharkfin on your KLR650 to protect the rear disk - this is for the 1987 -2007 This is an easy add-on. You will need 24mm and 19mm sockets and drivers for them, or wrenches, or a combination of both. You'll also need a 3, 4, 5, and 6mm hex key or driver. Have the Kawasaki shop manual handy, and refer to it as you go. If you have never done something like this before, have a professional mechanic do it for you. Since you are doing the work, you are assuming all liability. Remove the 2 bolts holding the rear brake caliper to it's carrier - that part that locates on the swingarm and axle. Use the 6mm hex driver. Hang the caliper with a pice of coat hanger or bungee cord so it's above teh swingarm, out of the way. Don't press the rear brake pedal while it's off. Support the bike and remove the rear axle. If you can use a lift and set it so the rear wheel is barely touching the ground, it can make things easier. Remove the rear wheel. Be sure to see where all the spacers go as you do this. Remove the rear brake carrier from the swing arm. Take a look at this picture so you can get a general idea how the part mounts to the carrier.
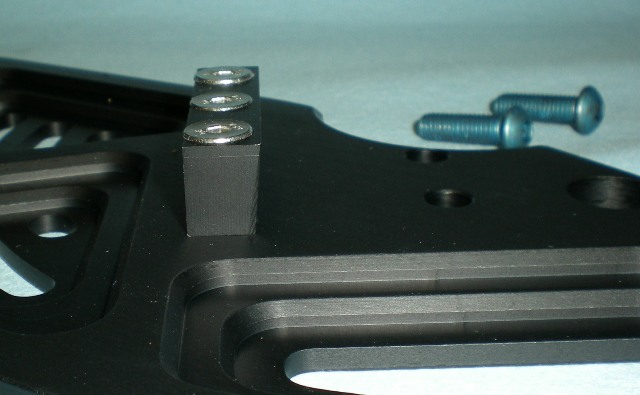
If the small locating block isn't already on the sharkfin, install it now, using the (3) 5mm screws. Important: be sure the angled surface will match up with the angled surface of the brake carrier. Use blue loctite. Tighten the screws to about 45 to 50 inch-lbs, or snug. See pic - note how the angled surface of the little block is toward the upper edge of the fin.
Using the (2) 6mm bolts and loctite, attach the sharkfin to the carrier, push the locating block against the carrier, and tighten the 6mm bolts to about 75 inch-lbs.
Put the carrier back on the swingarm. Put the rear wheel back in place, making sure all the spacers are correctly located. Put the axle through, and loosely install the nut. Double check to be sure everything is in place. Check your chain slack and adjust if needed. Check again to be sure all is correct and torque the axle nut. 72 ft-lbs in the manual I have. Install the brake caliper onto the carrier. IMPORTANT: be sure the pads go on each side of the disk as they should. Getting this wrong can mess up you pads, disk, and caliper. It's not hard to get right, just pay attention and be careful. Torque the bolts, 18 ft-lbs is the value in my manual. Carefully test the brakes. If they don't feel right, stop and fix them before riding. You're done! Enjoy your ride!
You can now order genuine Eagle parts here: eaglemike.com
|
|
Send mail to
Webmaster with questions or
comments about this web site.
|
![[Under Construction]](images/undercon.gif)